Bedroom Makeover July 26, 2020 – Posted in: Decorating, Furniture – Tags: , , , ,

Yesterday marks two months since we moved, and our bedroom was probably the last room to make the transition from “dumping ground of things to unpack” to “comfortable space that feels like ours.” So here’s where things are currently – and what’s still ahead of us (including some bad photoshop to give you a peek inside our heads).


If you recall from our before tour, this space was originally a living room (with another much larger living space upstairs with a nice big deck off of it). Since we quickly realized that we’d rather share that larger room & deck as a family, and sleep on the same level as our kids, we knew this room would be great as our bedroom. It also had a natural spot to add a closet & an ensuite bathroom… all we needed to do was close off that big doorway and add a door to the smaller opening beside it:


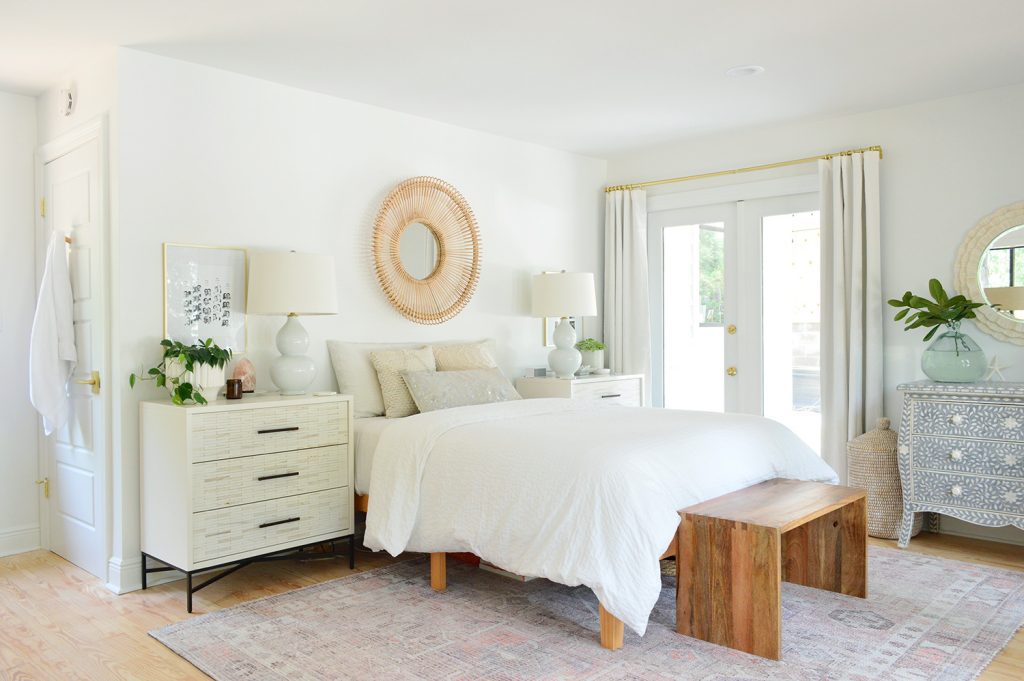
Just to save you from scrolling back up… voila:


Fun fact: this entire house only had two rooms with doors that you could close for privacy: our daughter’s room and the bathroom. So it’s a pretty big improvement to have a proper bedroom for ourselves with a door that closes (and a door for our son’s room while we’re at it!). It’s also just generally exciting that our bedroom is becoming the light-filled cozy space that we pictured during that rainy day walk-through in February. Especially since the majority of the items in the room are things we already owned.


Our only major additions have been the rug, the bed frame, and the curtains. We still need things like a proper headboard (we’ll likely make one – and are already building some for our kids’ rooms). And once we add a headboard, the mirror over the bed will probably move somewhere else (we won’t have two round mirrors this close to each other in here forever). This is just how it’s looking right now.

 
One of our favorite things about this room is the wall of glass doors across from the bed. It gives the room TONS of natural light and will eventually open to a private little patio/courtyard space for us to enjoy. But for privacy and light-blocking reasons, getting those suckers covered was one of our top priorities. For reference, this is what the room looked like on our first morning here before we were able to get our temporary curtains (aka packing blankets) out of that gorgeous blue pod that you see outside.

 
We’re still not 100% free of packing blankets (we tack them up every night in the three windows of the room while we not-so-patiently wait for our shades to arrive) but at least now we’ve got blackout curtains on all of the doors to keep the sun out and give us privacy. You can hear more about why we chose them in this podcast episode, but the gist is that we used a Memorial Day sale to score some nice blackout-lined curtain panels in their “Ivory” color (that’s the actual color name, but “talc” or “light sand” seems like a closer description). Since the walls are pure white in here, we thought it would feel layered & less stark than going with white curtains on white walls.


We hung our new curtains using these brass curtain rods and matching rings – and once the fabric relaxed a bit after hanging them we could move the clips from the top of the curtain panels down about an inch to the nylon loops on the back of the panels so they aren’t all visible along the top.

And our super long curtain rod is actually just 3 separate rods butted up against one another. We hung them next to each other for the illusion of one long rod, using a laser level to keep things straight as we went.

 
Remember I promised you some bad photoshop? Here’s the rough idea of the privacy fence we’re eventually planning to add to enclose the yard outside of our bedroom to carve out a private little courtyard area for us to hang out in at night. We’re thinking just a little outdoor seating area (maybe a fire pit?) that Sherry and I could lounge around in after the kids go to bed. Maybe we’ll grow some sort of flowering vine on the fence using this trick? You can see more of our inspiration for our private courtyard area here in this post.

 
The fence won’t be that exact design/color/etc. This is just bad photoshop, but you get the idea. Something to make that area feel nestled and more private will be nice. Heck, maybe there’s a DIY water feature in our future.
It’s hard to tell in the photos above, but this picture that was taken from outside (at dusk, no less!) shows you the stairs that lead down to the yard from the bedroom. We’ve already hung some string lights that are charming to look at from bed, but other than that, there’s not a whole lot of reason to actually come outside and enjoy that space… yet.
The fourth set of double doors in the room is next to Sherry’s side of the bed. That’s where we plan to eventually add an ensuite bathroom (it’ll be built in part of the side porch that currently exists out there). Although sharing one bathroom so far has not been nearly as annoying as we expected it would be.


We debated not buying curtains for this side because it won’t always be this double door setup leading outside (and might end up being just one frosted glass door that leads to a bathroom – which wouldn’t need curtains), but the ensuite bathroom project is gradually moving down our priority list, so we didn’t want to live with packing blanket curtains forever. Plus we figure we can eventually use these in the detached guest room that we’re adding down the line.
I should’ve mentioned another purchase for the room that we made was buying a second one of these wood-tiled dressers that we’re using as nightstands. We purchased one 7 years ago and, miracle of all miracles, West Elm still sells it! We worried it might have a different wood tone or hardware length or something in all that time – but it arrived and is identical to the one we’ve had for all these years!


Using dressers as nightstands provides us some much-needed clothing storage while we’re still closet-less and, well, you know Sherry’s love of anything inlay. Also keeping the inlay theme alive and kicking in here is this secondhand dresser (Sherry’s most beloved Facebook marketplace find to date) that used to live in the pink house.


We also bought our new rug from West Elm and a certain someone who loves a soft surface to lay on is especially happy to have it in here. We really wanted something subtle (both color and pattern-wise) and this ended up fitting the bill even better than we expected. It appears to be mostly pink in their website photos, but it has a lot of neutral tan and gray tones and even some lavender in person, which surprised us in the best way.


We only needed an 8×10′ size in here (for reference, our last bedroom had something like a 12×15′ rug in it!). It nicely anchors the bed area, and gives us a soft spot for our feet to land when we step out of bed. Or launch-out-at-60-mph-at-the-sound-of-someone-pouring-cereal if you’re Burger.


Now that you’ve seen the “put together” side of the room, let’s turn around and reveal the side that still has a ways to go: the fireplace side. How’s this for a motley crew of random objects? Old Ikea filing cabinet? Check. Air purifier? Sure. Comically small looking end table from Target a few years back? Ok. One lone HomeGoods lamp on one side tipping the balance a lot more in that direction? Why not. Please also remember that these are the windows with packing blankets tacked up every evening as well (now do you see why we wax poetic about the view out the bedroom doors by comparison?).

We think eventually we could do some cool symmetrical built-in storage on either side of the fireplace (smart storage is the key to life in this smaller house for sure!). But for now, this is where we’re at.

At least it’s better than where we were a few weeks ago!


I mentioned that we’ve got shades on order for the windows, and after the natural gas company hooks up the service line to our tankless water heater, we’re also converting the fireplace to gas logs. We’ll likely build some sort of mantle and figure out what to do furniture-wise in front of the fireplace. I like to describe our current arrangement as “a potted plant enjoying a good book whilst relaxing on a fur rug in front of a roaring fern.” There’s a romance novel plot in there somewhere.


Before you ask where the exact woven leather stools are from, they’re from Target years ago and they need to bring them back because they look about five times more expensive than they were ($60 on sale I think?). They do make these $99 counter stool versions though.

The other corner is where things get even weirder, but we’ve got an idea that we’re excited about. This corner is a very strange not-square-at-all angle, and due to the wall sloping out there, there’s an oddly large amount of floor space in just that corner of the room. It was also the only place our minisplit AC/heater could be installed, but we have a plan for dealing with that whole strange zone. Go with me here…


Although we originally planned to add a closet next to the bathroom in that unused side porch area right off of this room, we realized that if we actually enclosed this corner for the closet, we could (1) square off the corner a bit more so it’s less wonky looking (2) eliminate that awkward extra unused floor space (3) earn ourselves a closet without having to cram it into the bathroom footprint at all. My photoshop below is SUPER rough (it doesn’t even have a door) but it gives you an idea of what we mean. It even seems to make more sense of that window placement.


Rather than a traditional closet, we’re thinking it might look more like something below (with a drywalled side wall but two lattice doors in the front). This would allow the minisplit to freely vent air into the room, while also adding some nice texture, tons of function, and filling in that awkward bare space. It wouldn’t be the largest closet in the world, but you already know we have minimal clothing needs. Right now all of our hanging clothes are in our son’s closet, which is less than 28″ wide, and everything else fits comfortably in our dressers.


This picture is especially inspiring to us when it comes to the wood tone and nice thick framing at the top that we’re drawn to.


It’s not a fully formed idea quite yet, but we’re excited to have an idea to explore that’ll make that corner easier on the eyes & a lot more storage-friendly. For now we’re thrilled that our bedroom has come as far as it has in these last two months. Also do you have any idea how much you can store under a wood bed frame like this? It’s kind of amazing.


Now if our window shades can just get here so we never have to see our packing blanket curtains again, I’ll really be over the moon.
« 5 Easy Kitchen Updates
Upstairs Family Room »