Painted Kitchen Cabinets September 8, 2020 – Posted in: Furniture, Home Improvement – Tags: kitchen, kitchen cabinets
I never thought I would use the word “mauve” and “fresh” in the same sentence, but here we are. We decided to embrace the existing counters and go for a tone-on-tone look for Phase One – just because why the heck not?! When else do you get mauve counters to work with?

After doing five quick & easy updates to our kitchen that made a pretty big difference a few weeks back, we knew that painting the old chipping cabinets would also really go a long way in making this room feel a lot less worn out. So after testing two potential colors on the doors below, we both ended up liking the darker color on the right cabinet that almost exactly matches the counters.

The winning color = Sherwin Williams Artsy Pink (we used their “Emerald” paint in a satin finish). And today we’re going to share how the whole cabinet painting project went, along with a couple of other updates we did to our old kitchen cabinets at the same time, including installing hidden hinges – which really did make a huge difference for a nice low price.

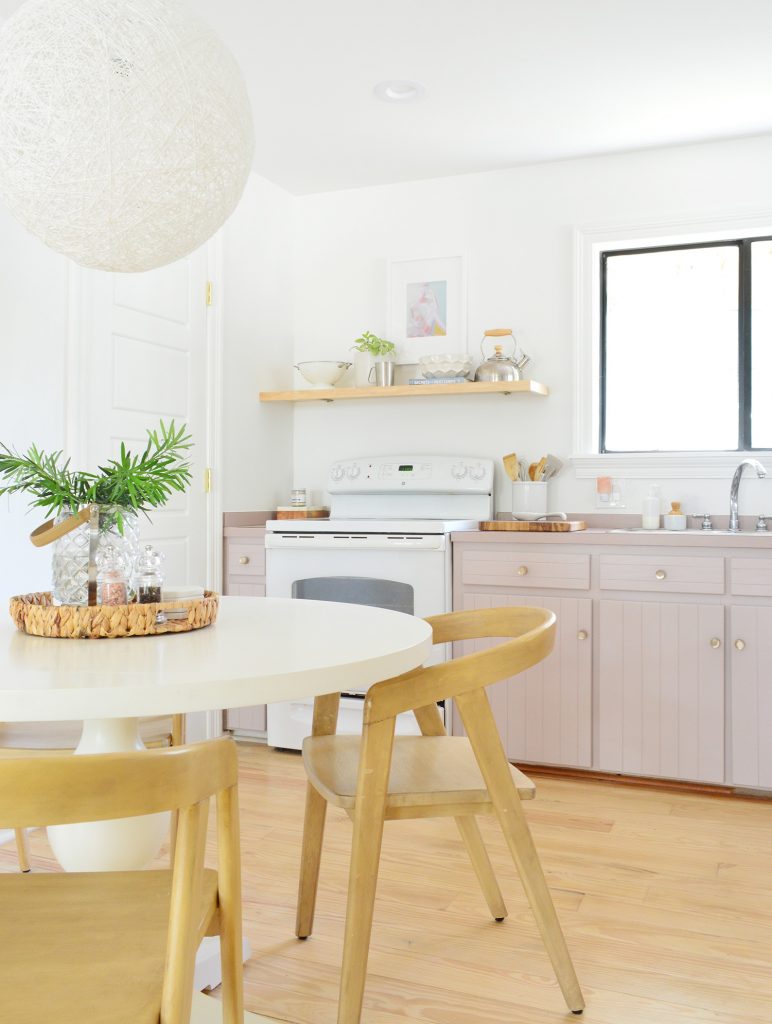
Here’s the kitchen as it looks right now (yes, we succeeded in our goal to also paint the dishwasher that we mentioned here – and it worked! More on that in a second).

And for reference, here’s the kitchen as it looked when we bought the house. It definitely feels significantly more open and just generally a lot more like “us,” which makes it a lot more enjoyable to use.

This room is in the heart of our house (literally, it’s in the middle of it all) and we’re all in here all the time – especially with virtual learning going on (one kid is often down here at the table while the other’s upstairs at the art desk) so we’re grateful to have a spot that feels comfortable and functional.
Going back to the color choice for a minute – you know I love a full circle moment. And this progress photo was snapped while the soffits were being removed and the floor was being patched (you can read more about those renovation details here) – but look what color the kitchen walls once were! That’s right. This room was destined to be mauve. The even funnier thing is that when we were crouching down on the floor painting the cabinets, the toekick of the cabinets were ALSO MAUVE! So at one point the walls and the cabinets in here were that color!

The other funny thing about the color we picked is that it’s on the exact same color swatch as the pink that we used for the duplex doors. Those doors were Sherwin Williams White Truffle, and Artsy Pink is literally on the same swatch card, touching White Truffle, just a shade deeper. We already have an extremely thorough cabinet paint tutorial (with a video!) that you can follow, but here’s the quick version of what went down in here. First, we removed all of the doors and drawers from the frames, along with all of the hardware and hinges. These are actually new hidden hinges, which I’ll tell you more about later in this post.

We wiped the doors and frames down with liquid deglosser (it’s especially important in a kitchen where cabinets can be covered with oil drips and grease, which messes with paint adhesion). And in the case of one door, we scraped off an exterminator sticker from 1991. Let’s all pause to appreciate that 1991 is nearly THIRTY years ago.

We also chose to quickly sand each of the doors with our electric sander, since we couldn’t be sure how good the original paint job was (if you’re painting already-painted doors like ours, it’s a good idea because your new paint job is only going to hold as well as the one that you’re going over). We’re glad we did because we definitely uncovered some spots with poor adherence.

Then we primed both sides of each door using our favorite stain-blocking primer and a small 4″ foam roller for smooth surfaces (these give you a really smooth result without brushstrokes). Also note, these seven doors constitute our entire kitchen (plus 5 drawers). SEVEN. So even though this was a methodical process that took a few days, thanks to drying and curing time, each step was super fast.

Once both sides of the doors were dry from their coat of primer, we then painted each side Artsy Pink (ugh, I wish it had a less cheesy name) and let them cure for about 4 days before reinstalling (the longer you let the paint cure, the harder and less likely it is to get dinged up). Another pro to having so few cabinets to paint – this whole cabinet paint job only took less than a quart of paint. And that was with two coats on everything!

Meanwhile, back on the cabinet frames in the kitchen, we sanded and patched any holes with wood filler, like where the old hinges had been screwed in.

Then we could proceed with priming and painting the cabinet frames themselves. With all of the doors off, we also used this opportunity to paint the INSIDES of the cabinets, which made them feel a lot more fresh & updated. You can see how raw they were all this time – just unfinished plywood boxes against unpainted drywall.

I can’t underscore how much better it feels to have all of that primed & painted with two coats of semi-gloss white (Pure White by Sherwin Williams). In some ways, it was this part of the project that made the cabinets feel the most “refreshed” because they felt extra unfinished inside before.

We’ll share more info about how our kitchen is organized in another post (we had around 3 or 4 times as many cabinets in our last kitchen, but everything we need fits in here, thanks to a few tricks we’ll share in that post). But for now I can enthusiastically say that if you have a small kitchen it can definitely be worth it to repaint the inside of the cabinets while you’re doing the doors and drawer fronts. Sherry even added these thick clear shelf liners to keep things from scraping up our new paint job. So that’s how we got this room to this current point, and the quart of paint, a few other painting supplies like rollers & wood putty, and the hidden hinges that we bought all added up to about $96 spent! YES, it was UNDER $100 for this entire update!

But now they’re fresh and smooth, inside and out.


We did lightly sand it before rolling on the same paint we used for the cabinets – and even after plenty of steaming cycles, it’s holding steady.

It helps to keep this small section of lower cabinets from feeling chopped up by a stark white appliance (the “white” dishwasher color was more stark/cool than the “white” stove color on the other side of the room – so if it had balanced more and felt the same tone we might have left it alone). I never thought we’d get excited about a purply-pink dishwasher, but again, here we are.

The unsung hero of this update is the hinge swap that happened. You can see in this photo from our first kitchen post that the cabinets originally had those old surface-mount hinges that are visible on the front of the cabinet. They were painted over at least two times (they probably once were mauve and later were painted white), so they creaked and just felt gummed up and past their prime.

We worried that a darker paint color would only accentuate them and gum them up even more, so we took the time (and about $40) to swap them out for a hidden-style hinge. Oh and see that corner of the counter that used to be cracked off? Sherry stole the panel from the side of the counter and cut it and crazy glued it to fit. Now it looks pretty seamless. I think she’s going to do an Instagram Story video to show you how it turned out.

Installing them was a little bit tedious, but along the way we discovered a trick that made it MUCH faster than following the instructions. I think the instruction’s method was geared more towards someone installing these on new cabinets that had never had hinges before, not for someone replacing existing hinges. So we actually made a video to show our little cheat for speeding the process along. (You can also watch it here on YouTube) If you can’t watch the video right now, come back to view it when you can because a video always feels more helpful than photos can be – especially in this case (also there are a few moments where I demonstrate just how smooth I am, so tune in for that). In the meantime, here’s a brief version of what we did. Instead of using the paper templates provided in the packaging – which involved a lot of cutting, taping, leveling, pencil-marking, etc. – we temporarily installed the new hinge OVER the old hinge using one existing screw that lined up with the new hinge holes.

This held the new hinge perfectly in place so that we could drill pilot holes for the screws on the cabinet frame side. Our frames were a bit thinner than the hinge itself (see how the back holes overhang the frame) but we show in the video how we overcame this with a long screw driven in at an angle, back into frame.

With our pilot holes drilled, we could remove both hinges (new and old) and then reattach the new hinge using the two pilot holes on the frame and existing screw hole on the door. From here we could easily drill pilot holes for the remaining screws on the door side of the hinge, and screw in the remaining screws. No templates. No pencil marks. No measuring.

Also, WE DID THIS BEFORE WE PAINTED THE DOORS AND CABINETS! That way if there was any issue that we needed to fix with wood putty, we could without needing to repaint anything. Definitely do that if you can! One other thing of note that I learned in the process (and forgot to point out in the video) is that it may help to install the door-side screws in two separate steps. First, add the screws in those two oblong holes and close the door to make sure it doesn’t look crooked or askew. You can adjust the hinge on those two oblong holes by loosening the screw and shifting the hinge forward or backward on the screw. Once you’re happy with how the door looks closed, then you can drill your pilot holes and add the screws in the two-round holes to “lock in” your placement.